This post is part of a series of posts that provide step-by-step instructions on how to write a simple web scraper using Ruby on morph.io. If you find any problems, let us know in the comments so we can improve these tutorials.
With just a few lines of code, you can write a scraper to collect data from messy web pages and save it in a structured format you can work with.
This tutorial will take you through the process of writing a simple scraper. This tutorial uses the Ruby programming language, but you can apply the steps and techniques to any language available on morph.io.
Over this tutorial you will:
- create a scraper on morph.io
- clone it using git to work with on your local machine
- make sure you have the necessary dependencies installed
- write scraping code to collect information from a website
- publish and run your scraper on morph.io
In this first instalment you’ll create a scraper, clone it to your machine, and install
You’ll use morph.io, the command line and a code editor on your local machine.
Let’s get started.
Find the data you want to scrape
In this tutorial you’re going to write a simple scraper to collect information about the elected members of Australia’s Federal Parliament. For each member let’s capture their title, electorate, party, and the url for their individual page on the Parliament’s website.
The data you want to scrape needs to be available on the web. We’ve copied a basic list of members from the Parliament’s website to https://morph.io/documentation/examples/australian_members_of_parliament for practice scraping. You will target this page to get the member information with your scraper.
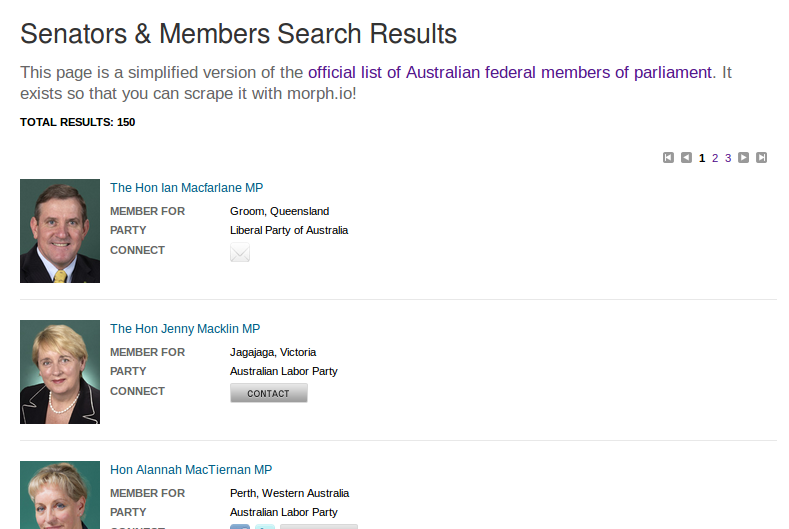
The simplified list of Australian MPs for you to scrape on morph.io
Some web pages are much harder to scrape than others. The member information you’re trying to collect is published in a simple HTML list, which means you should be able to target and collect the information you want quite easily. If the information was in an image or PDF then it would be much harder to access programmatically and therefore much harder to write a scraper for.
Now that you’ve found the data you want to scrape and you know you can scrape it, the next step is to set up your scraper.
Create your scraper on morph.io and clone it to your machine
The easiest way to get started is to create a new scraper on morph.io.
Select the language you want to write your scraper in. This tutorial uses Ruby, so let’s go with that.
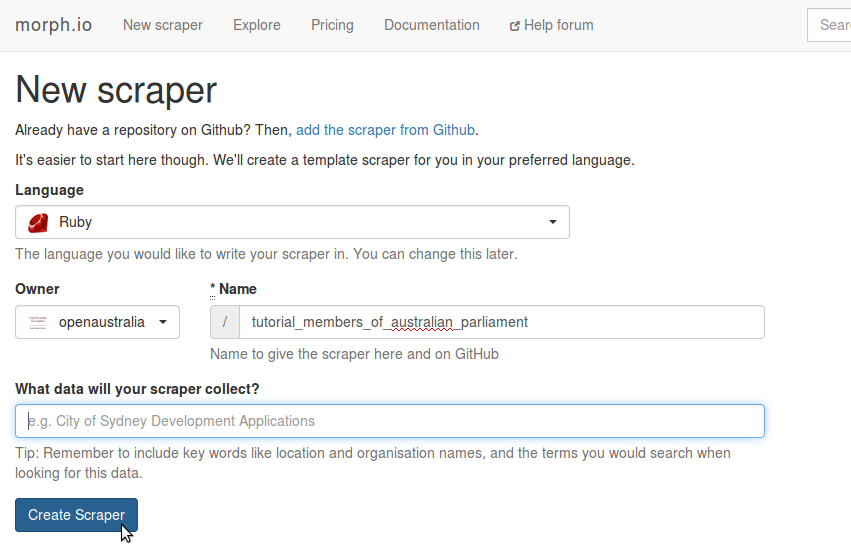
Fill out the new scraper form
If you are a member of organisations on GitHub, you can set the owner of your scraper to be either your own account or one of your organisations.
Choose a name and description for your scraper. Use keywords that will help you and others find this scraper on morph.io in the future. Let’s call this scraper “tutorial_members_of_australian_parliament” and describe it as “Collects members of Australia’s Federal Parliament (tutorial)”.
Click “Create Scraper”!
After morph.io has finished creating the new scraper you are taken to your fresh scraper page. You want to clone all the template scraper code morph.io provides to your local machine so you can work with it there.
On the scraper page there is a heading “Scraper code”, with a button to copy the “git clone URL”. This is the link to the GitHub repository of your scraper’s code. Click the button to copy the link to your clipboard.
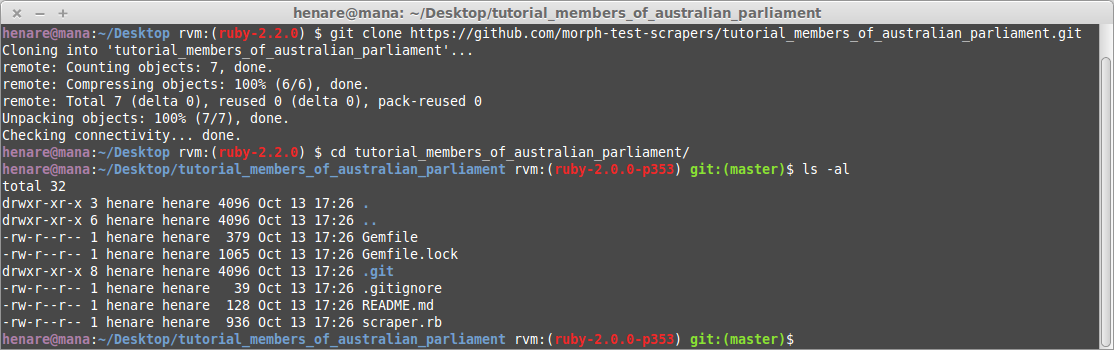
Commands you’ll need to enter to clone your repository
Open your computer’s command line and cd to the directory you want to work in. Type git clone then paste in the url you copied to get something like:
git clone https://github.com/username/tutorial_members_of_australian_parliament.gitThis command pulls down the code from GitHub and adds it to a new directory called nsw_parliament_current_session_bills. Change to that directory with cd tutorial_members_of_australian_parliament and then list the files with ls -al. You should see a bunch of files including:
- scraper.rb, the file that morph.io runs and that you’ll write your scraping code in
- Gemfile, which defines the dependencies you’ll need to run your scraper.
Now that you have the template scraper on your local machine, you need to make sure you have the necessary software installed to run it.
Installing Ruby
Installing Ruby is out of the scope of this tutorial but there are lots of good guides on the web. You might like to use something like RailsInstaller that takes care of this for you. Tools like rbenv or rvm can also be helpful for installing and switching Ruby versions on your computer.
Install the required libraries
In the Gemfile, you’ll see a Ruby version and two libraries specified:
ruby "2.0.0"

gem "scraperwiki", git: "https://github.com/openaustralia/scraperwiki-ruby.git", branch: "morph_defaults"
gem "mechanize"
This is template code that helps you get started by defining some basic dependencies for your scraper. You can read more about language versions and libraries in the morph.io documentation.
You can use Bundler to manage a Ruby project’s dependencies. Run, bundle install on the command line to check the Gemfile and install any libraries (called gems in Ruby) that are required.
So far you’ve set up all your files, cloned them to your machine, and installed the necessary dependencies. In our next post it’ll be time to write your scraper!